Getting Started With Pillowfort
Tutorial written by tikli. Also available as a Pillowfort post.
Page last updated on 20 August 2023 [change log].
Contents
Part 1: Make an Account
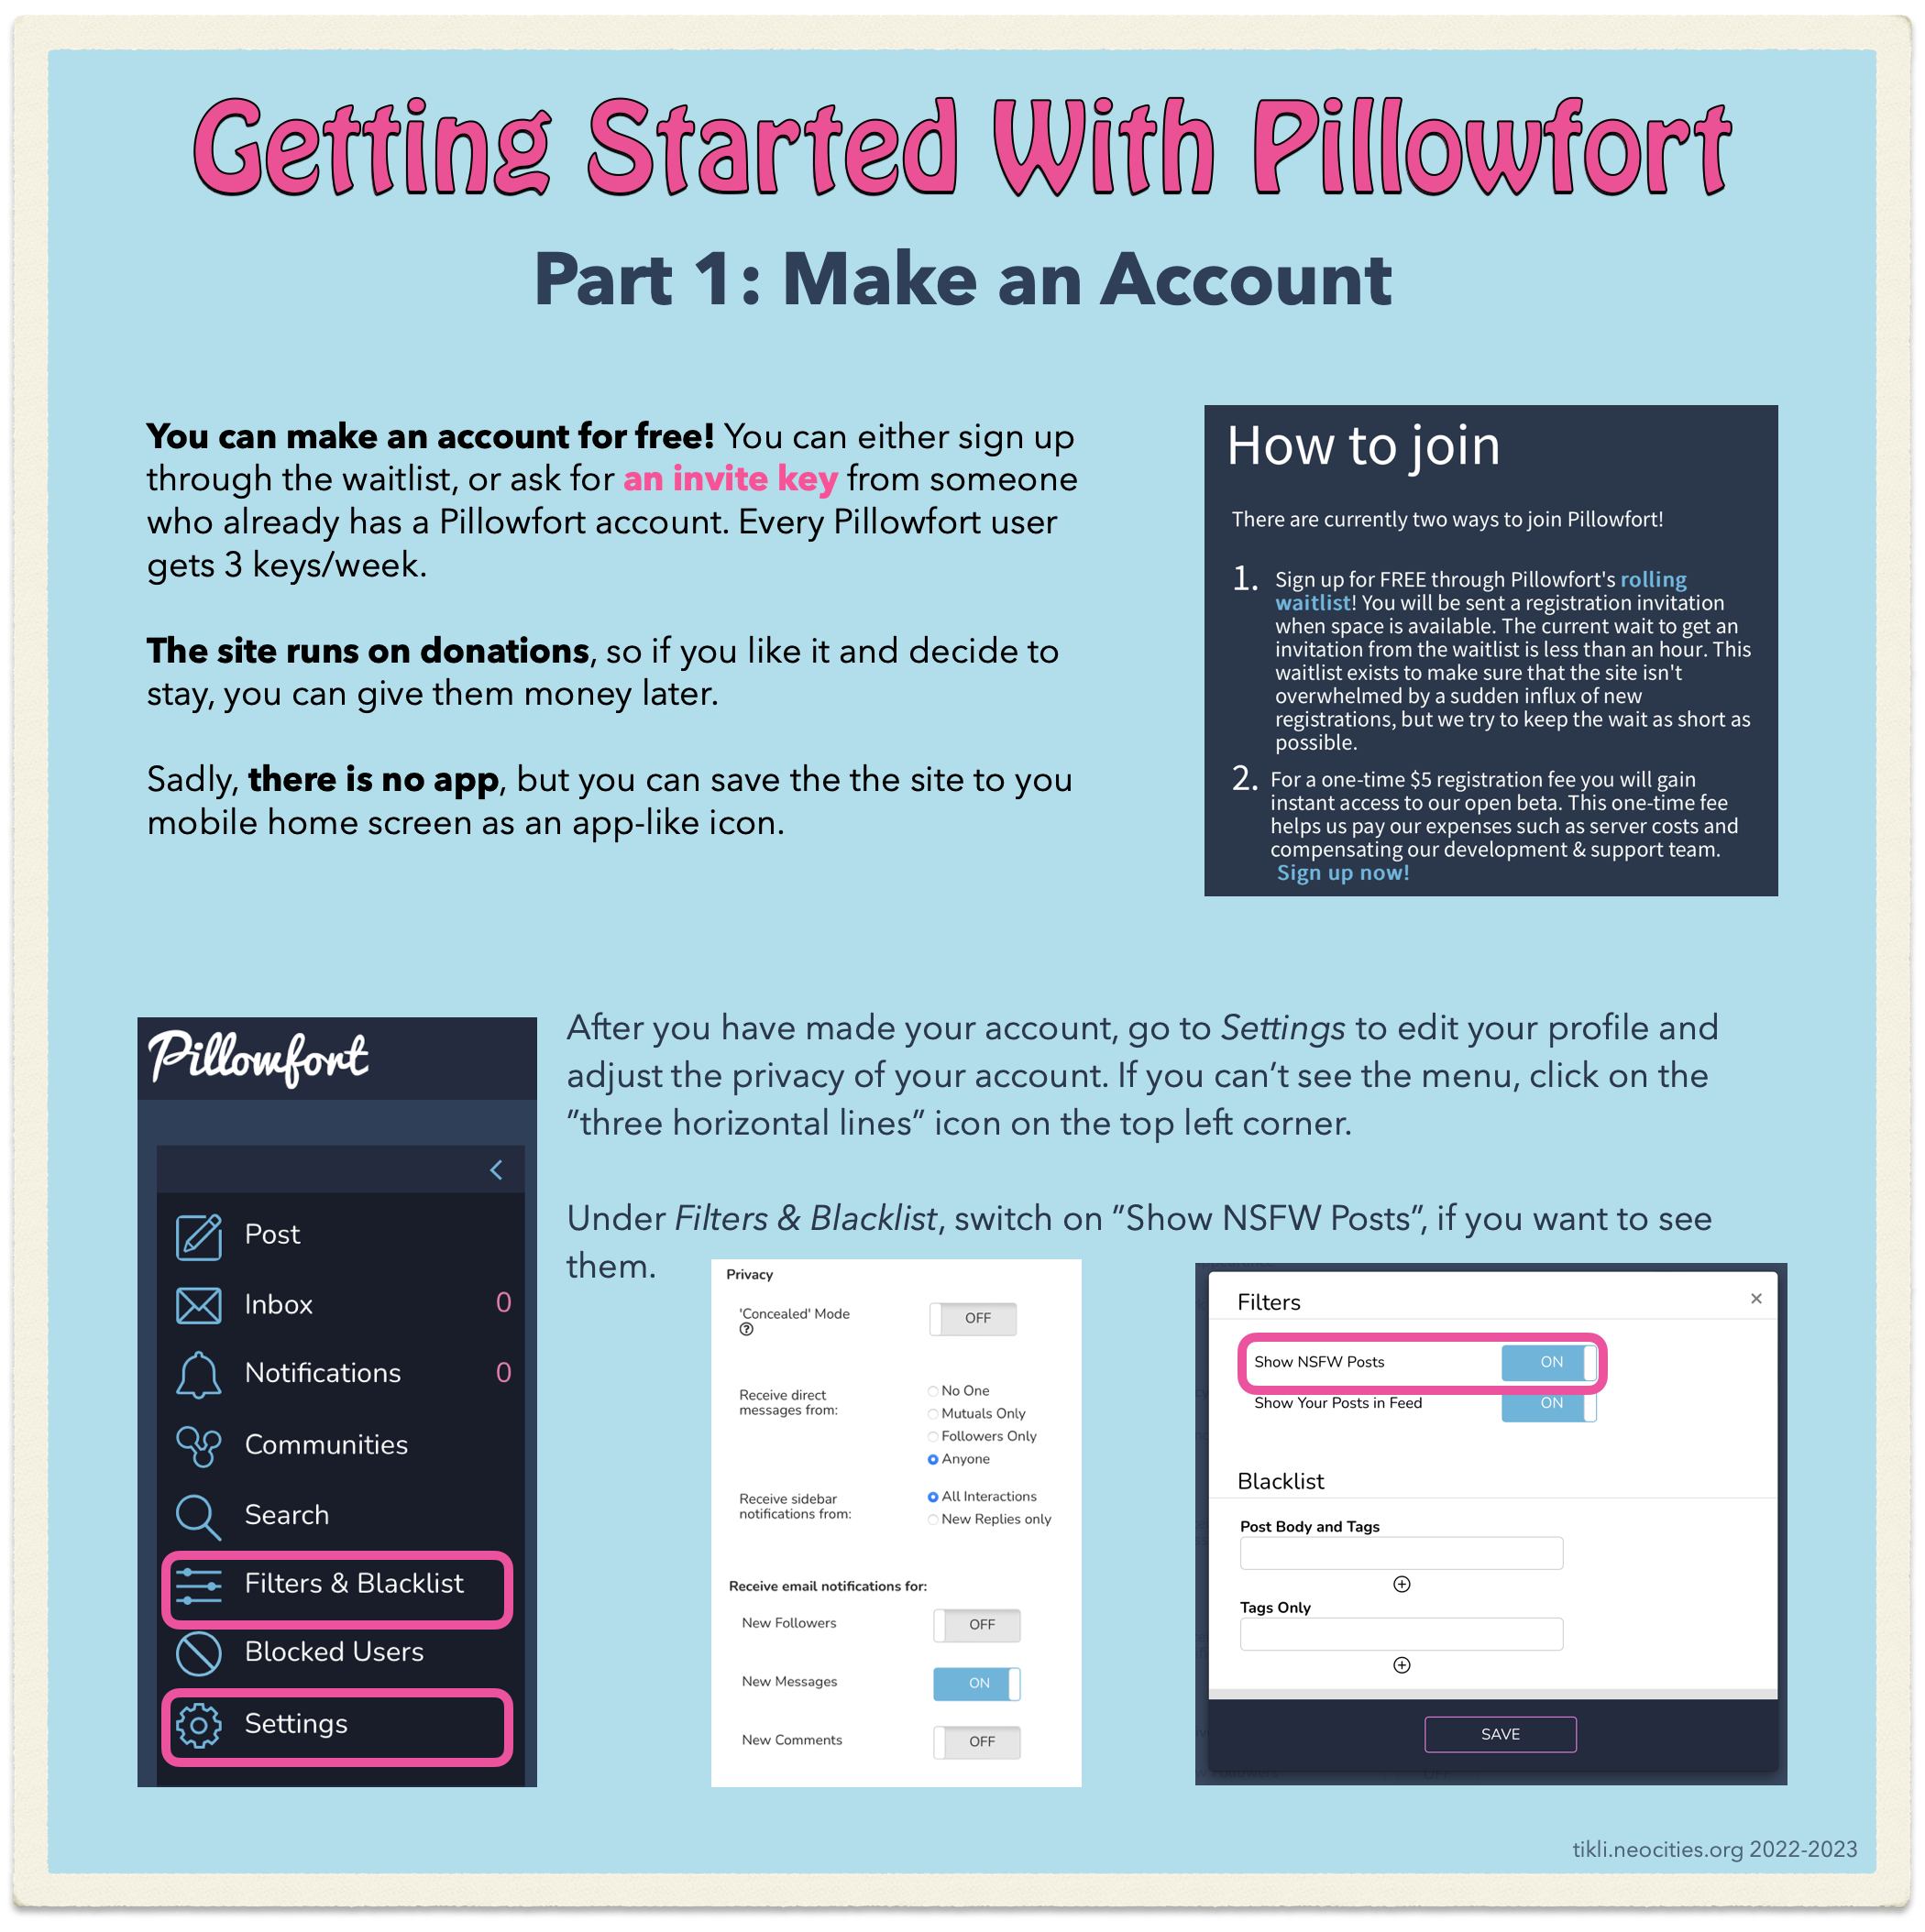
You can make an account for free! You can either sign up through the waitlist, or ask for an invite key from someone who already has a Pillowfort account. Every Pillowfort user gets 3 keys/week.
The site runs on donations, so if you like it and decide to stay, you can give them money later.
[a screenshot from Pillowfort's main page, "How to join"]
There are currently two ways to join Pillowfort!
- Sign up for FREE through Pillowfort's rolling waitlist! You will be sent a registration invitation when space is available. The current wait to get an invitation from the waitlist is less than an hour. This waitlist exists to make sure that the site isn't overwhelmed by a sudden influx of new registrations, but we try to keep the wait as short as possible.
- For a one-time $5 registration fee you will gain instant access to our open beta. This one-time fee helps us pay our expenses such as server costs and compensating our development & support team. Sign up now!
[end of screenshot]
Sadly, there is no app, but you can save the the site to you mobile home screen as an app-like icon.
After you have made your account, go to Settings to edit your profile and adjust the privacy of your account. If you can’t see the menu, click on the ”three horizontal lines” icon on the top left corner.
Under Filters & Blacklist, switch on ”Show NSFW Posts”, if you want to see them.
Part 2: Find Other Users
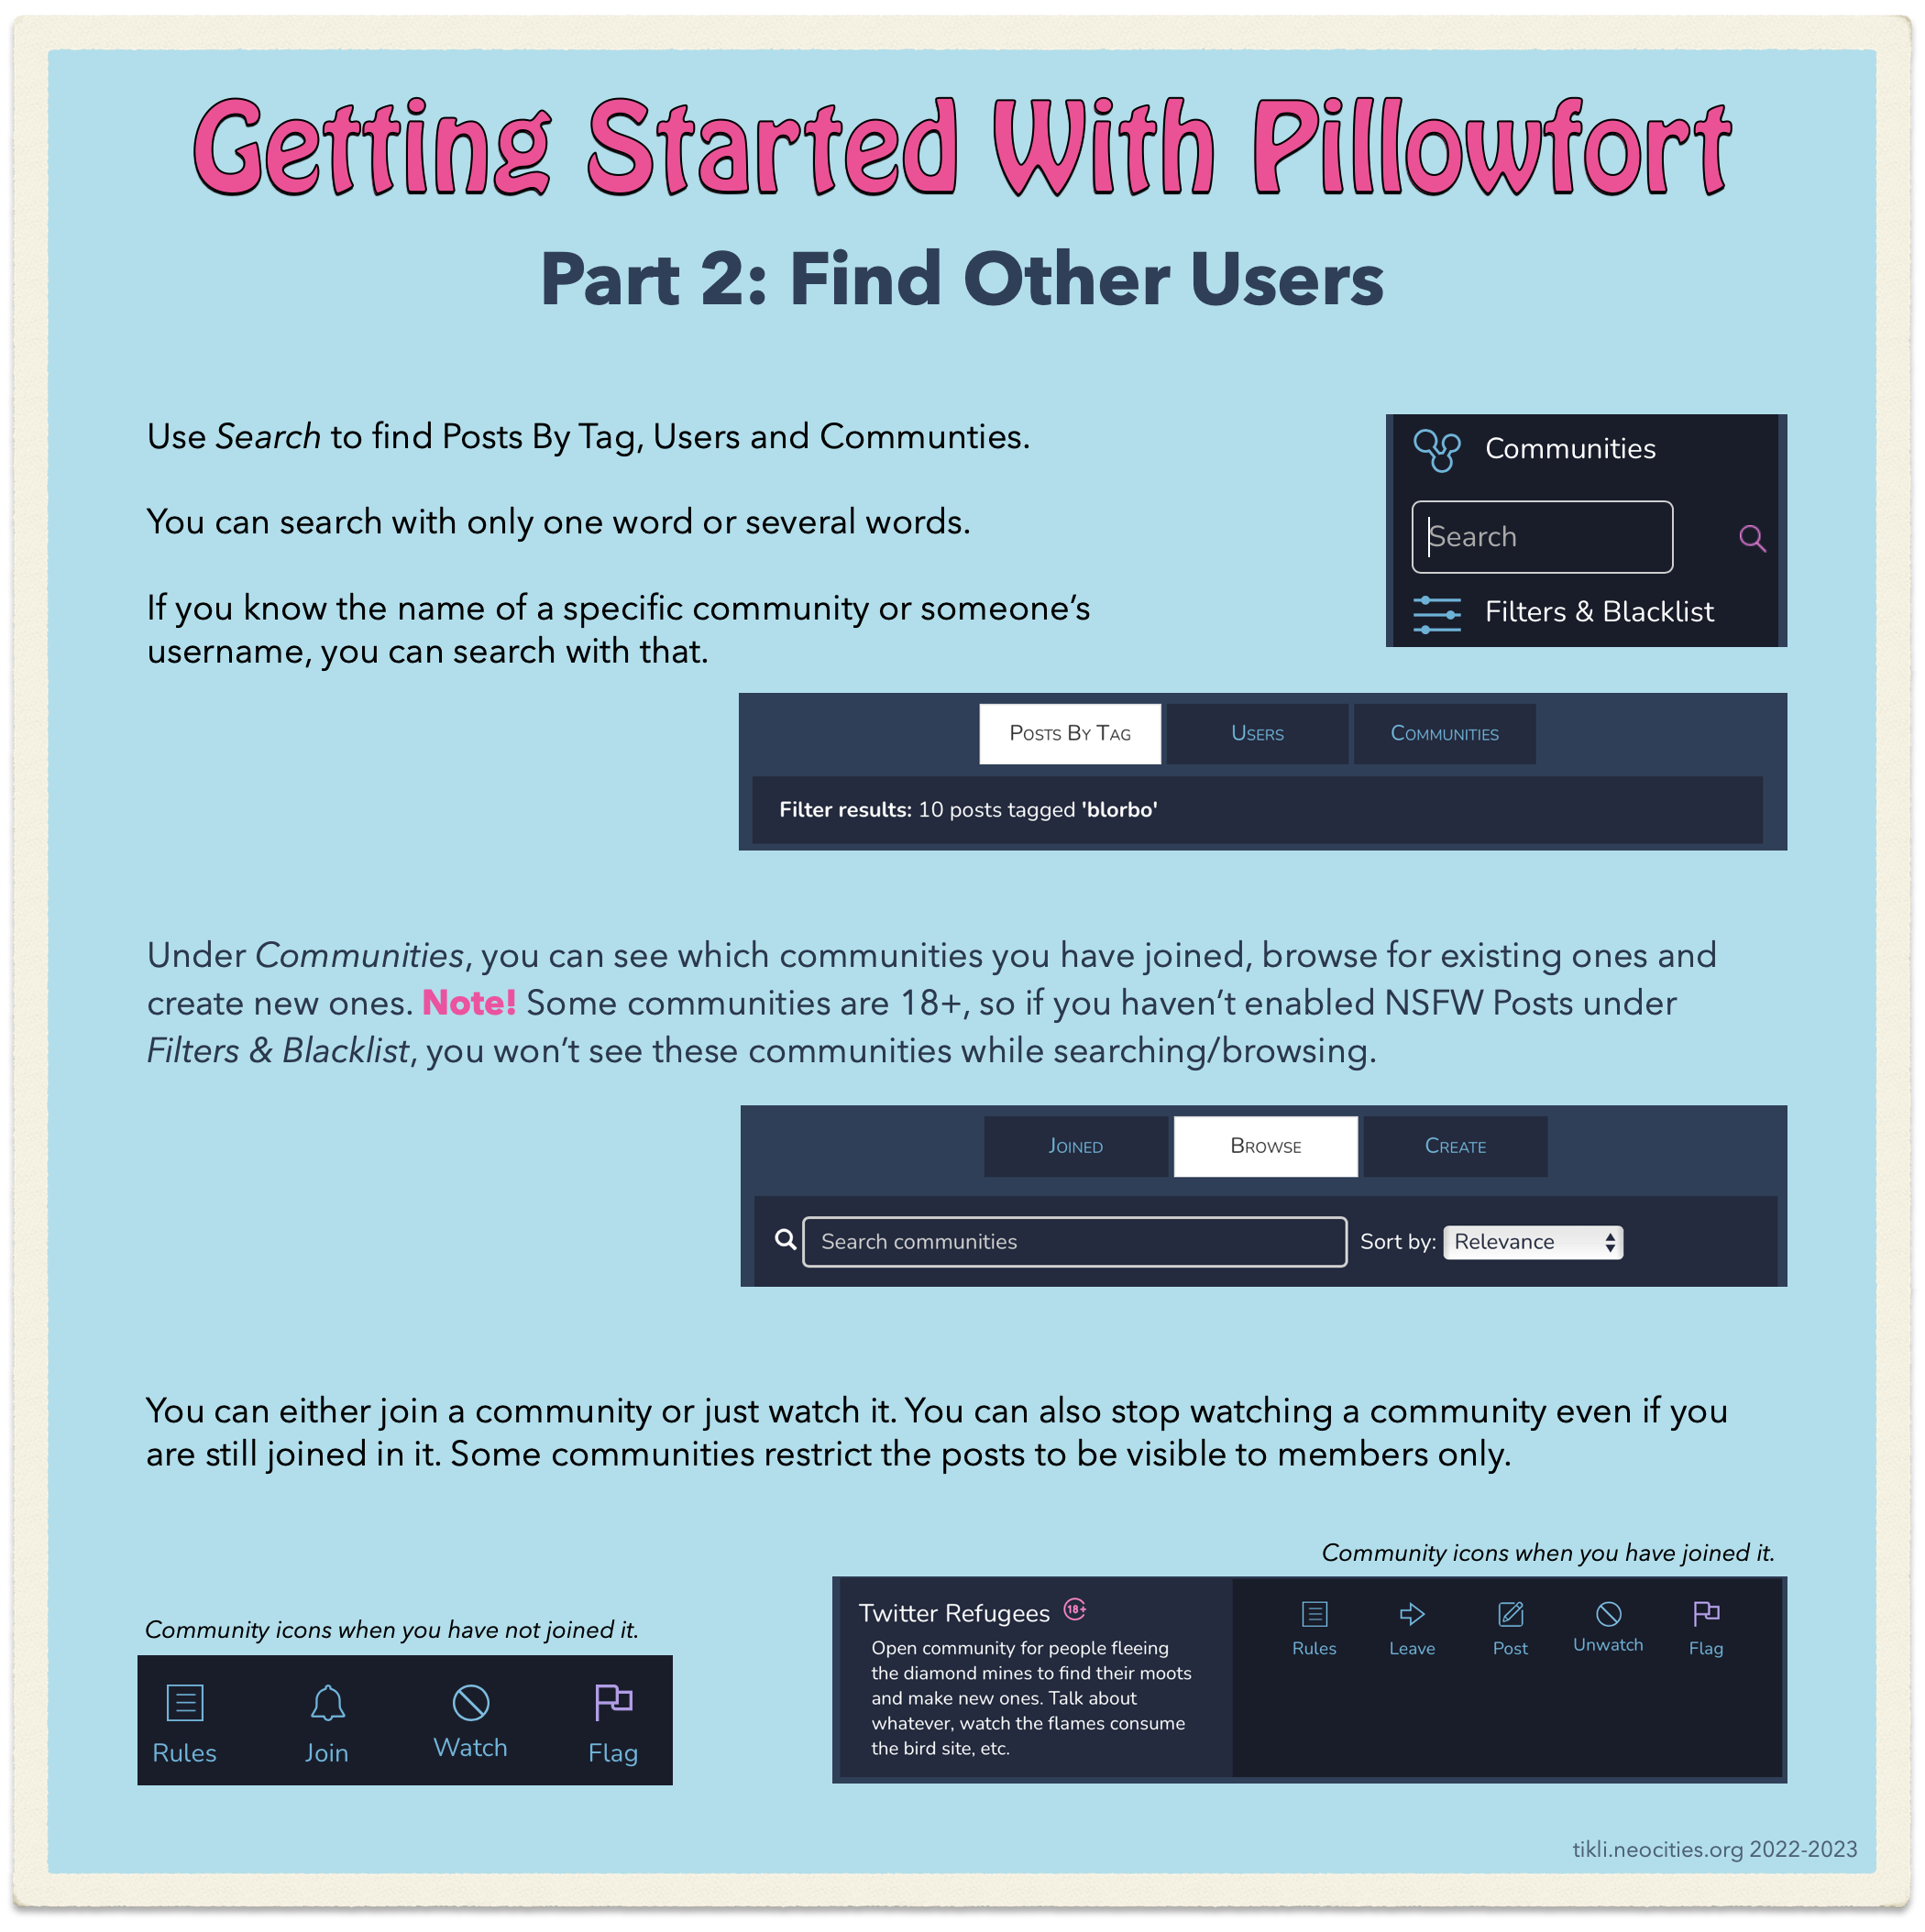
Use Search to find Posts By Tag, Users and Communties.
You can search with only one word or several words.
If you know the name of a specific community or someone’s username, you can search with that.
Under Communities, you can see which communities you have joined, browse for existing ones and create new ones. Note! Some communities are 18+, so if you haven’t enabled NSFW Posts under Filters & Blacklist, you won’t see these communities while searching/browsing.
You can either join a community or just watch it. You can also stop watching a community even if you are still joined in it. Some communities restrict the posts to be visible to members only.
[a screenshot of Community icons when you have not joined it]
Rules, Join, Watch, Flag
[end of screenshot]
[a screenshot of Community icons when you have joined it]
Rules, Leave, Post, Unwatch, Flag
[end of screenshot]
Part 3: How to Follow Others
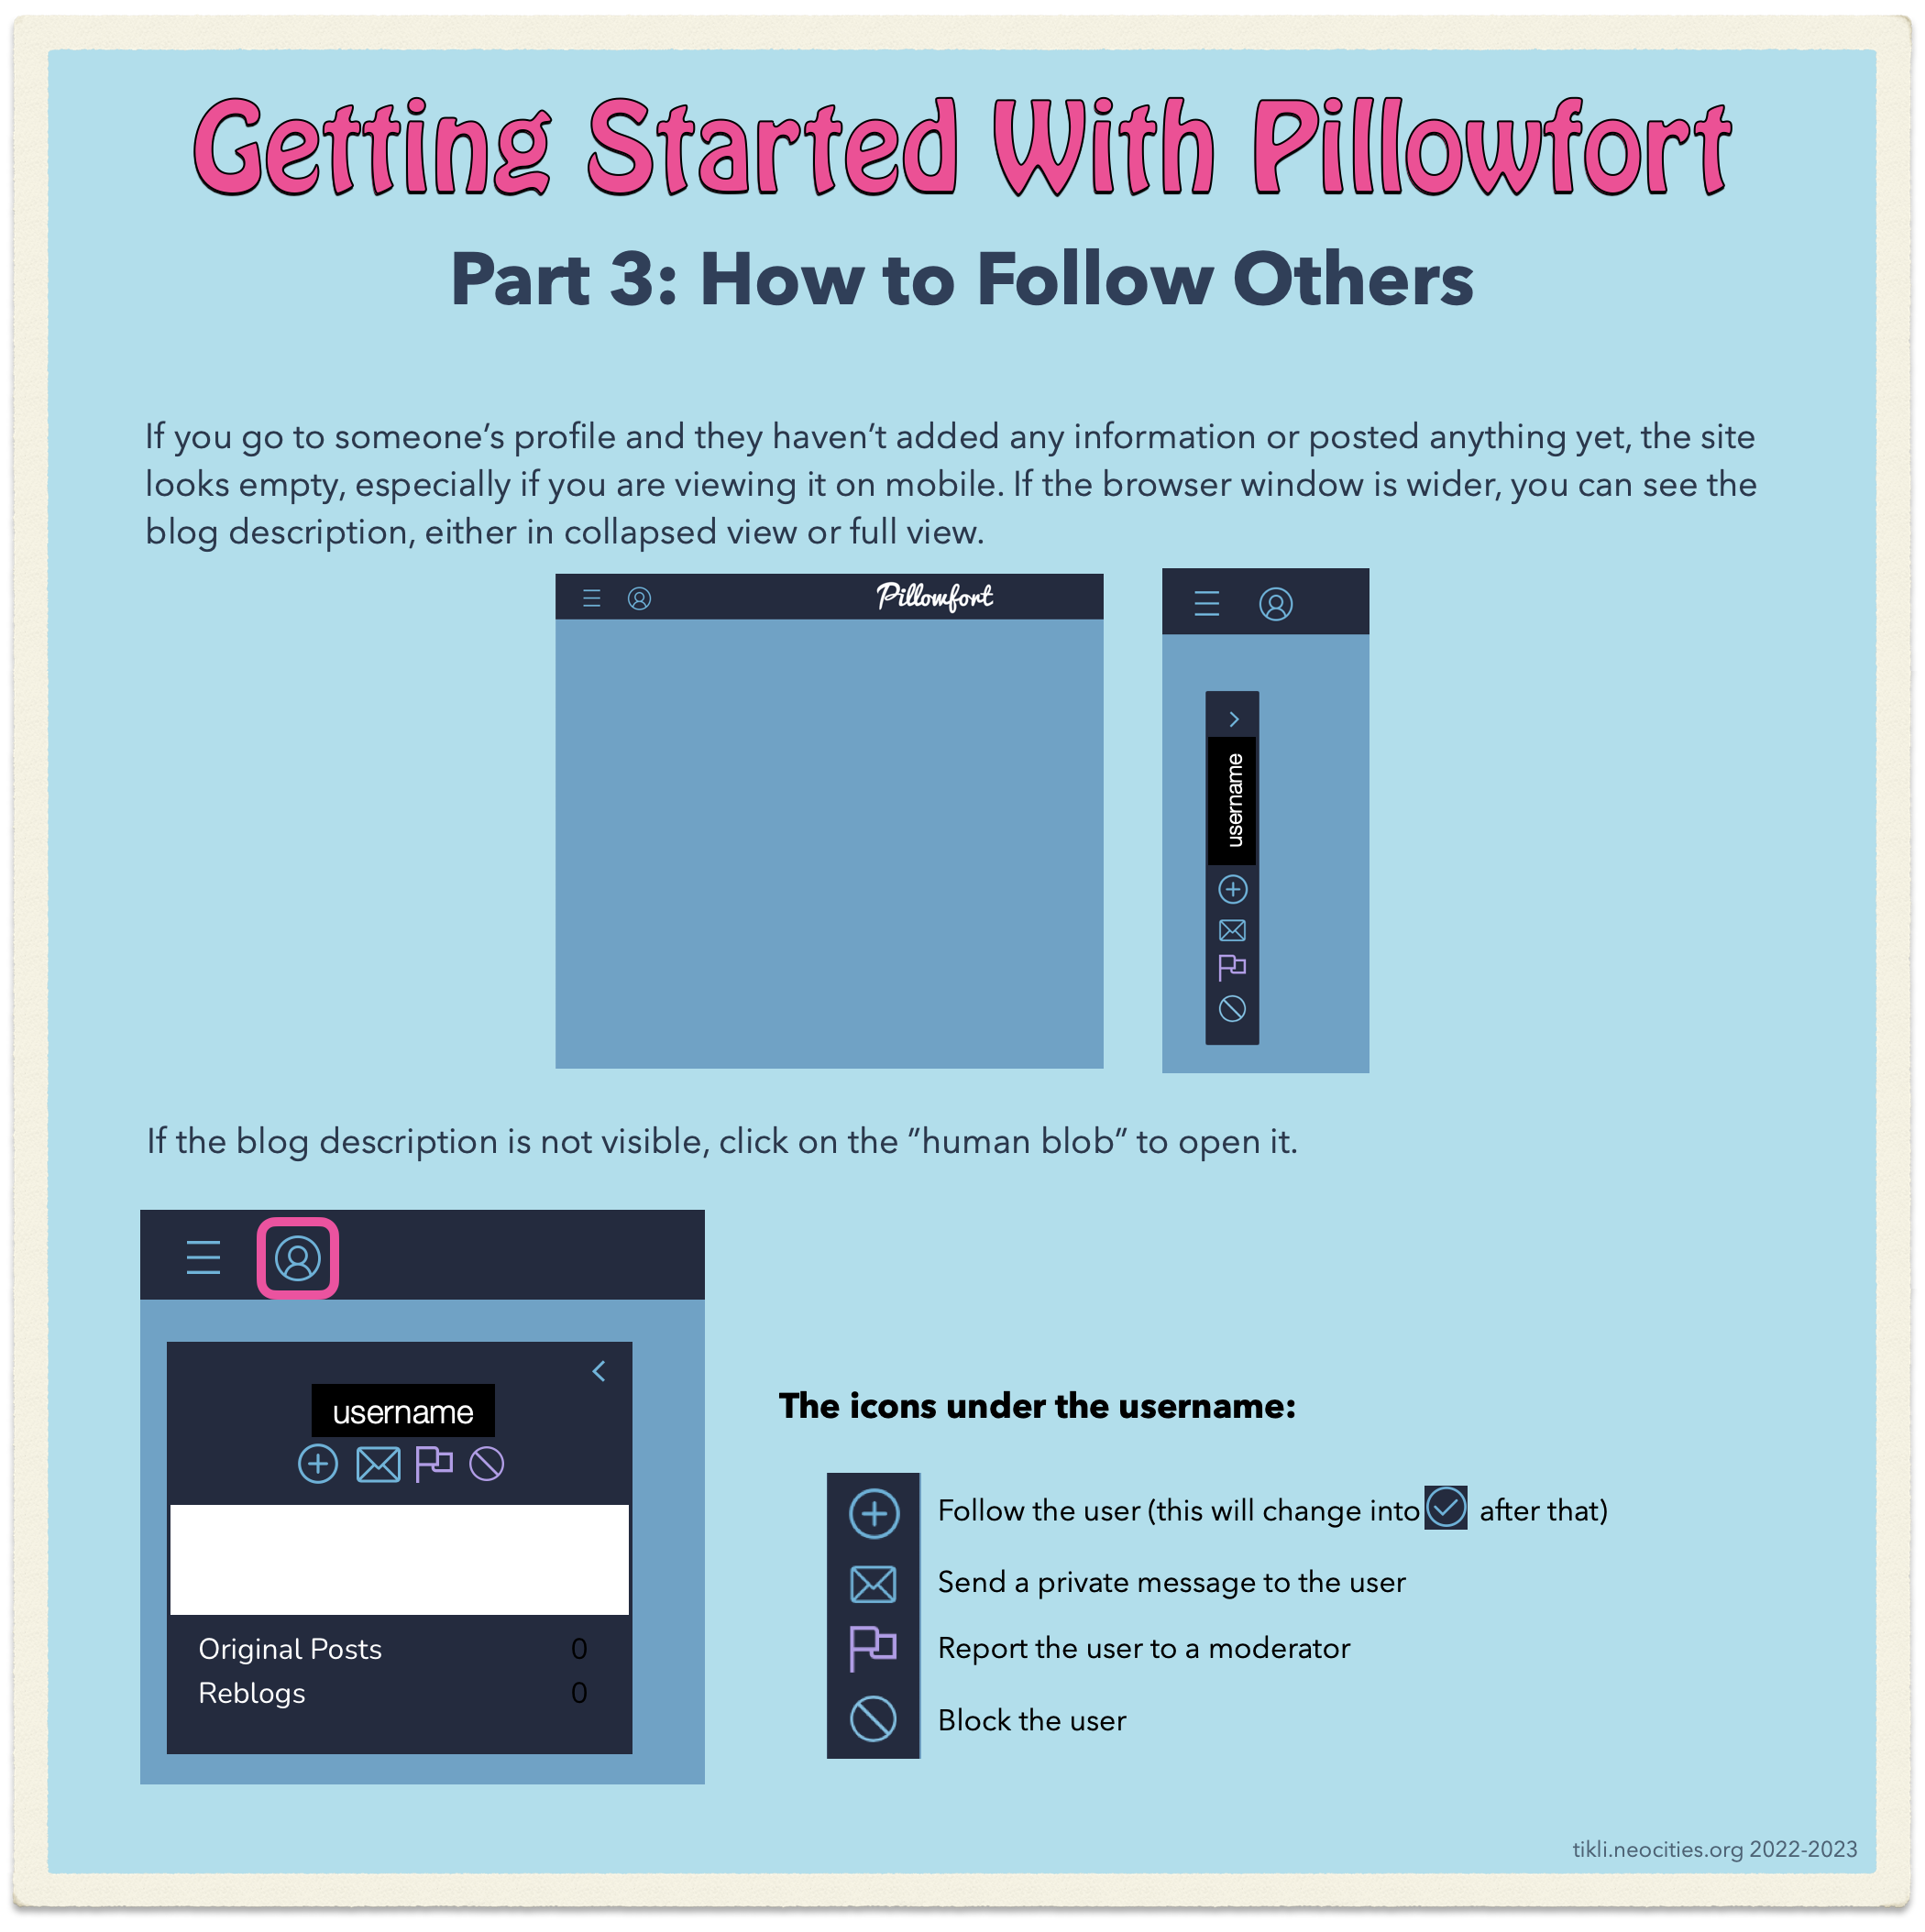
If you go to someone’s profile and they haven’t added any information or posted anything yet, the site looks empty, especially if you are viewing it on mobile. If the browser window is wider, you can see the blog description, either in collapsed view or full view.
If the blog description is not visible, click on the ”human blob” to open it.
The icons under the username:
- plus: Follow the user (this will change into a checkmark after that)
- envelope: Send a private message to the user
- flag: Report the user to a moderator
- no entry sign: Block the user
Part 4: How to Post
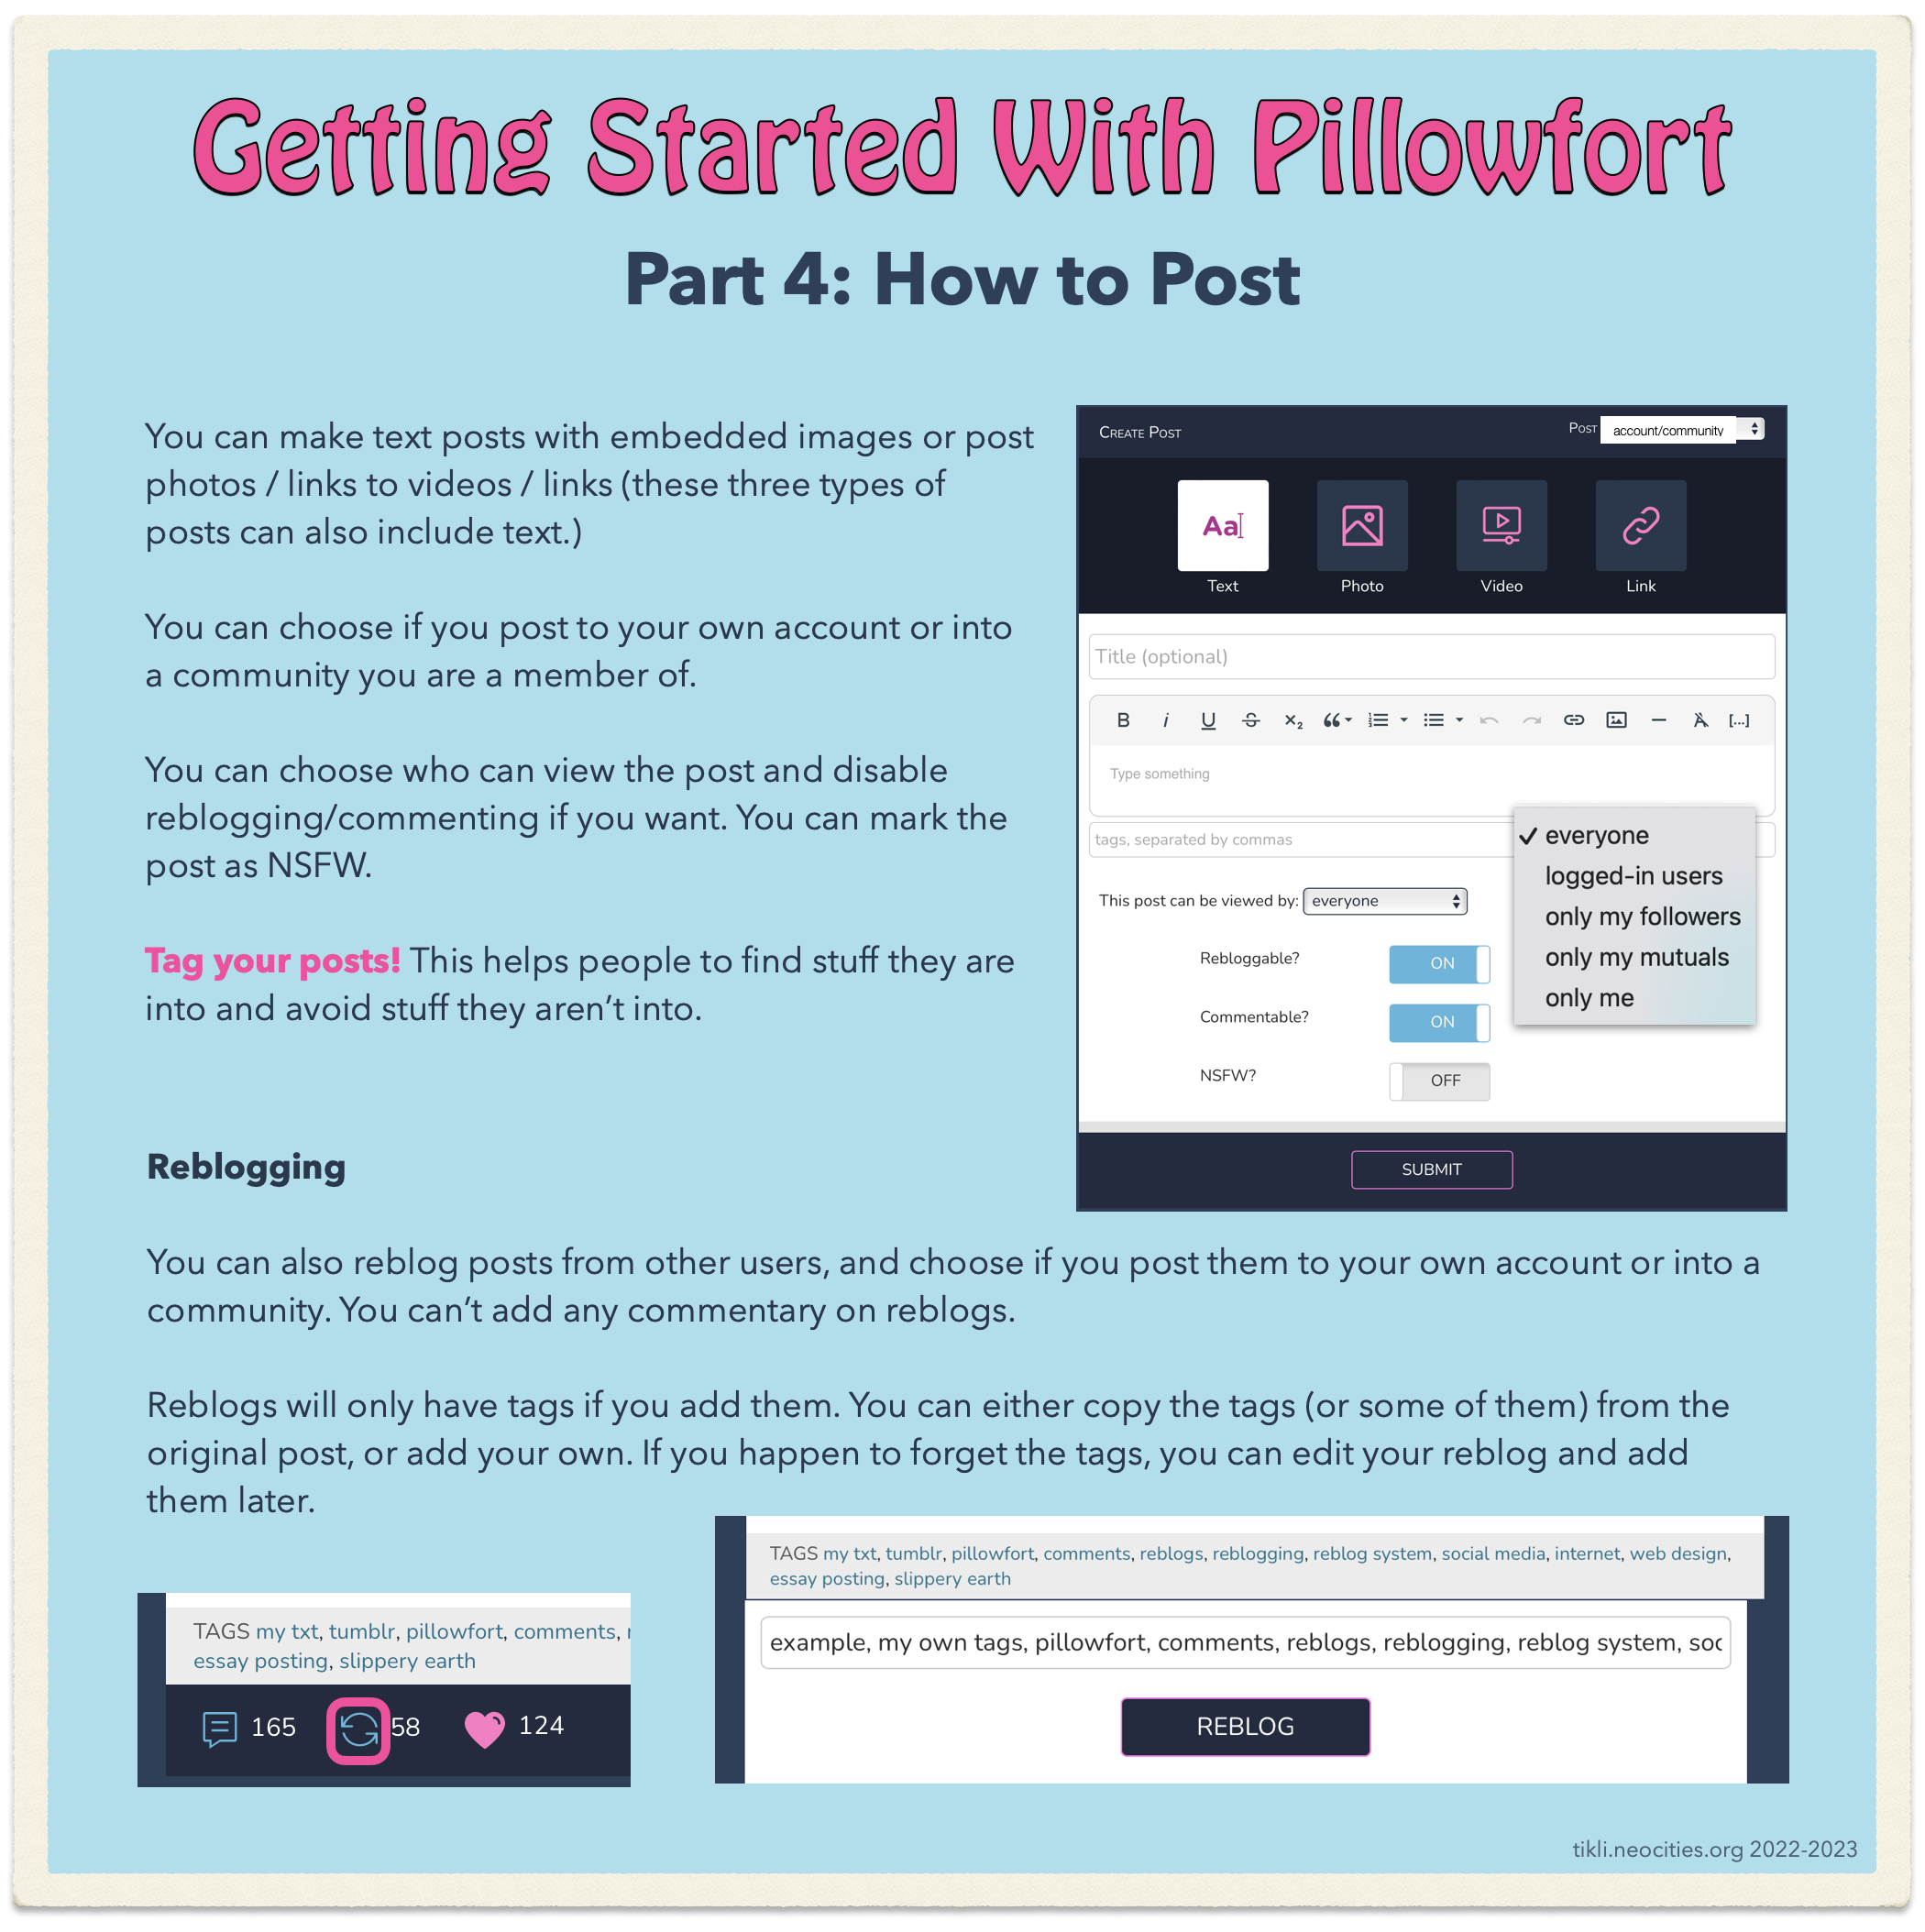
You can make text posts with embedded images or post photos / links to videos / links (these three types of posts can also include text.)
You can choose if you post to your own account or into a community you are a member of.
You can choose who can view the post and disable reblogging/commenting if you want. You can mark the post as NSFW.
[a screenshot of the "Create post" view]
On the top right corner there's a drop-down menu for choosing where you are posting. You can choose your account or any of the communities you belong to.
There are icons for different types of posts: Text, Photo, Video, Link. Text is chosen.
There's an optional title field, and below that is the field for the post. There's a tool bar that has the basic text formatting tools.
Below the post field there's a field for tags.
Post settings are below the tag field. There's a drop-down menu for who can view the post, with the following options:
- everyone
- logged-in users
- only my followers
- only my mutuals
- only me
There are on/off slide switches for the following features:
- Is the post Rebloggable?
- Is the post Commentable?
- Is the post NSFW?
[end of screenshot]
Tag your posts! This helps people to find stuff they are into and avoid stuff they aren’t into.
Reblogging
You can also reblog posts from other users, and choose if you post them to your own account or into a community. You can’t add any commentary on reblogs.
Reblogs will only have tags if you add them. You can either copy the tags (or some of them) from the original post, or add your own. If you happen to forget the tags, you can edit your reblog and add them later.
[A screenshot of the tag field when reblogging a post]
Tags of the original post are shown above the tag field that you can edit when reblogging the post. Tags are separated by commas and they can consist of several words.
[end of screenshot]
Part 5: Navigation
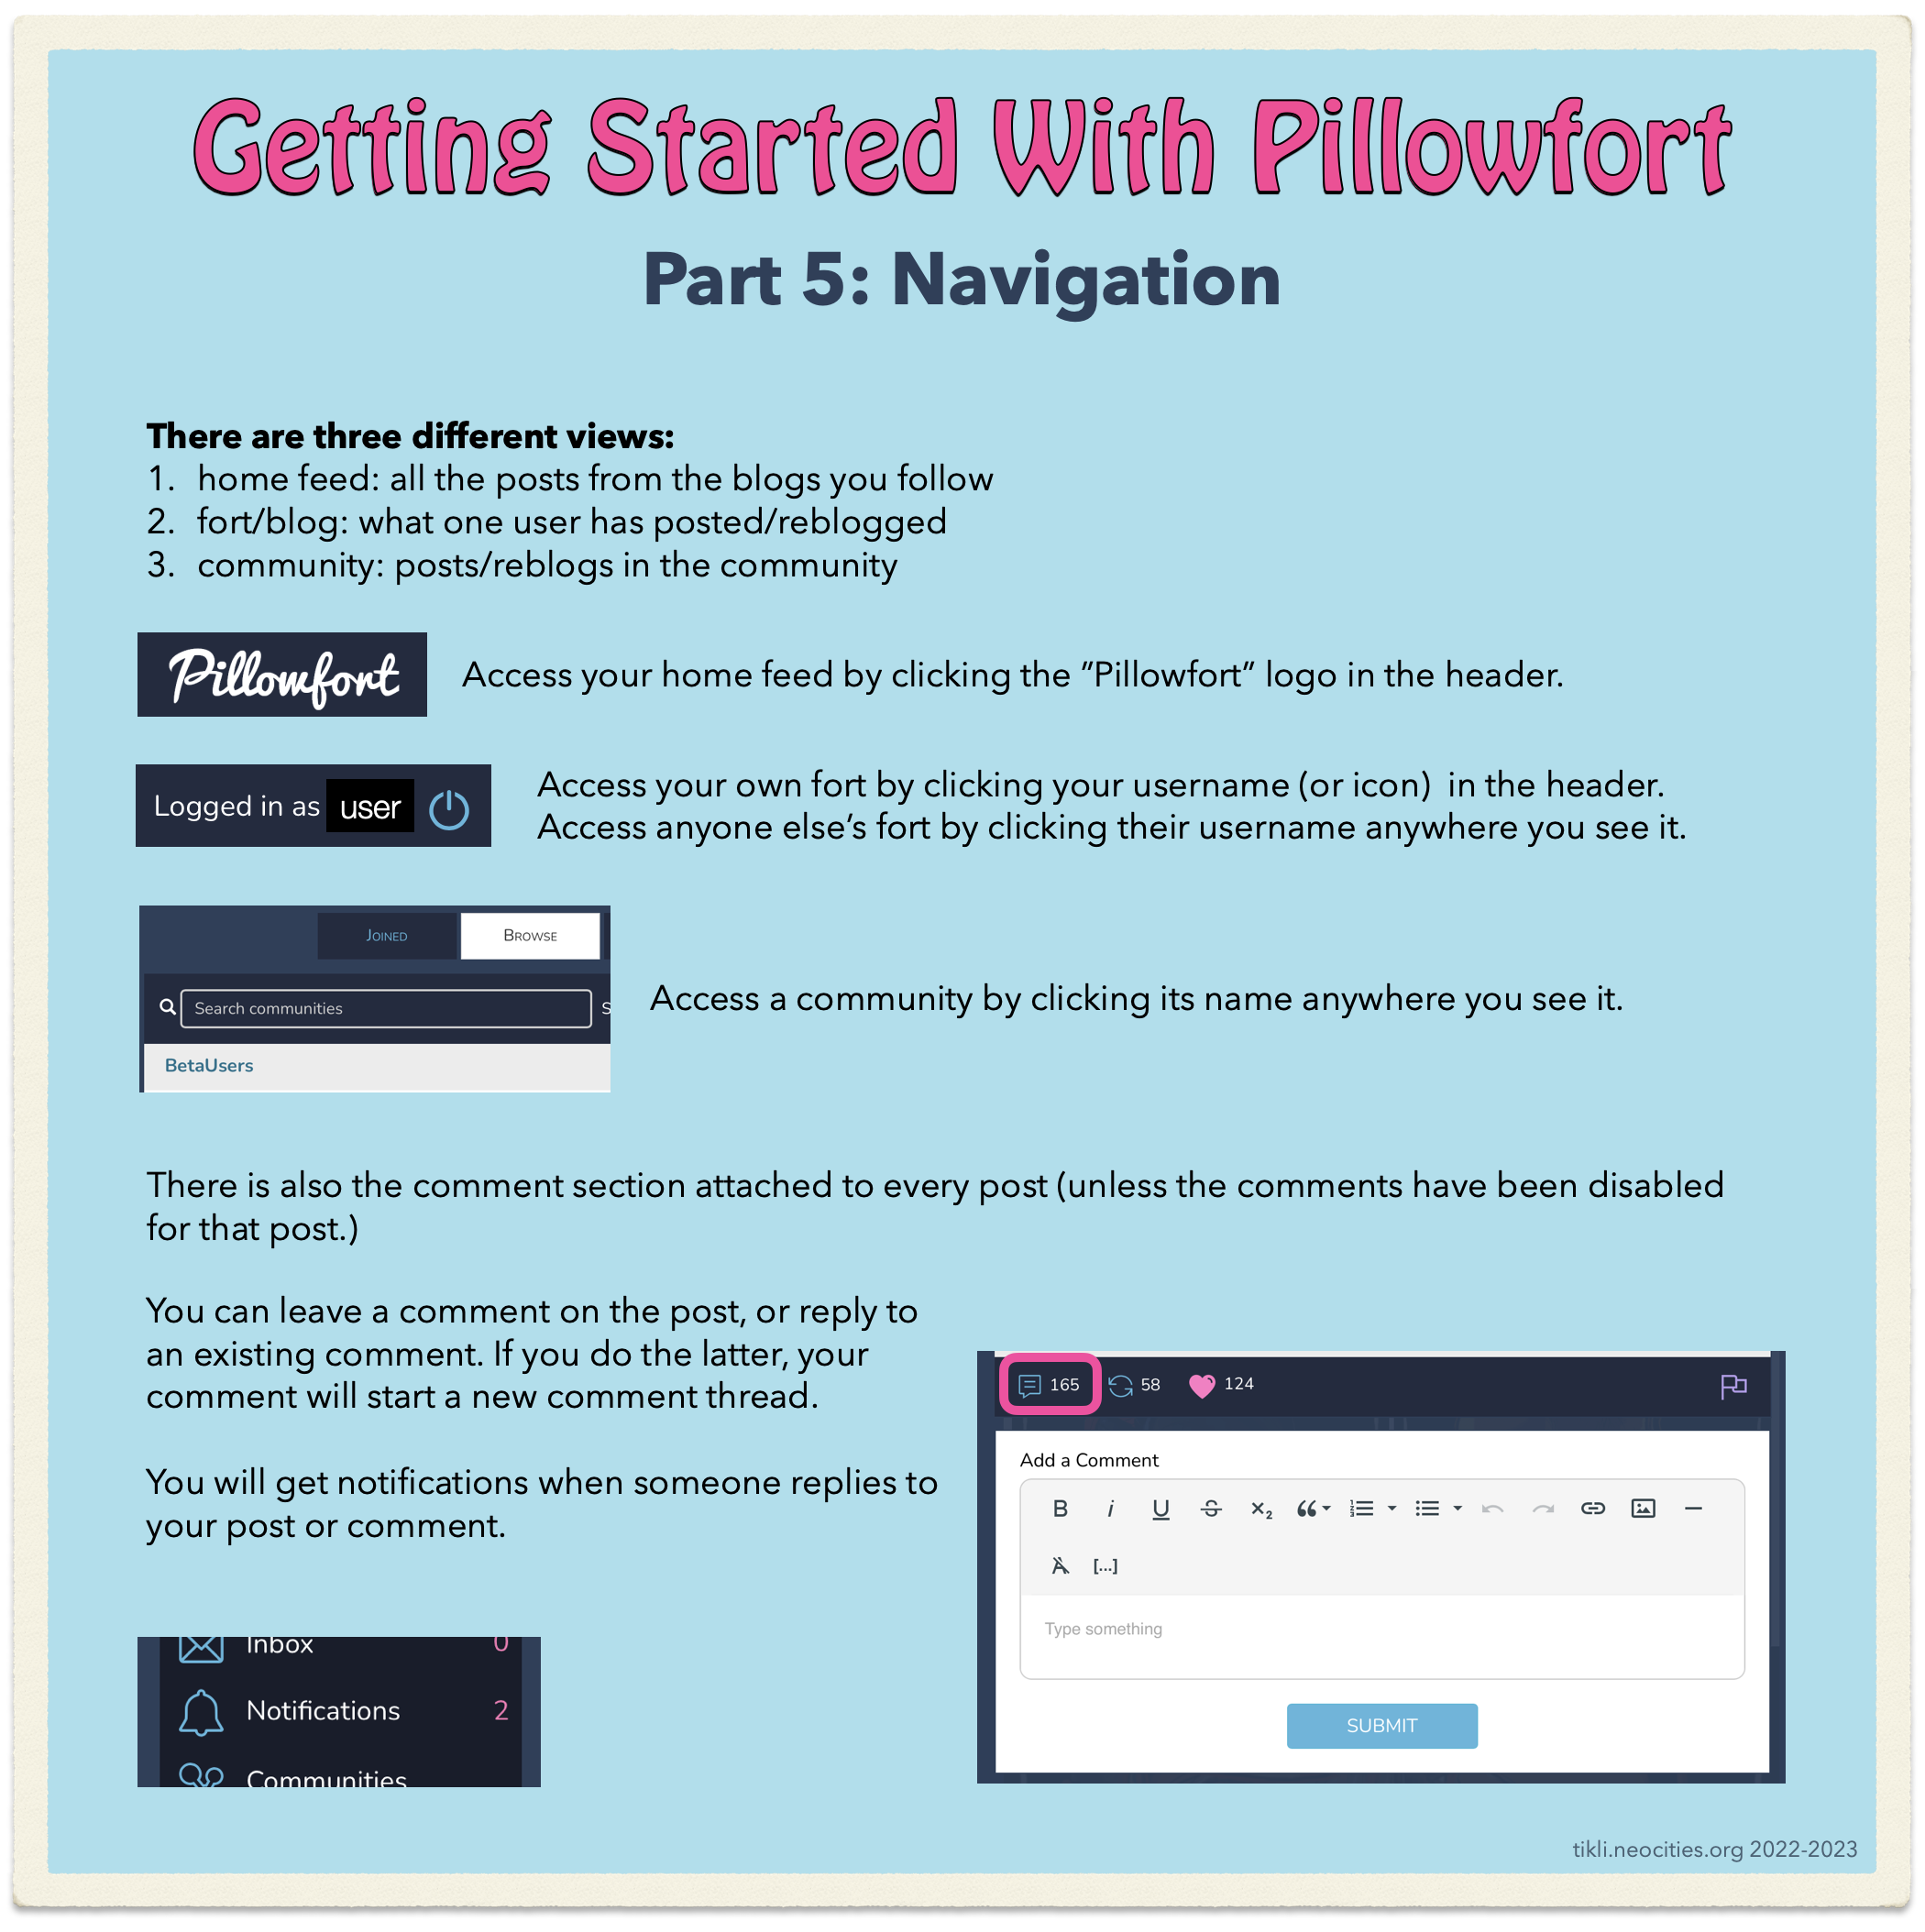
There are three different views:
- home feed: all the posts from the blogs you follow
- fort/blog: what one user has posted/reblogged
- community: posts/reblogs in the community
Access your home feed by clicking the ”Pillowfort” logo in the header.
Access your own fort by clicking your username (or icon) in the header.
Access anyone else’s fort by clicking their username anywhere you see it.
Access a community by clicking its name anywhere you see it.
There is also the comment section attached to every post (unless the comments have been disabled for that post.)
You can leave a comment on the post, or reply to an existing comment. If you do the latter, your comment will start a new comment thread.
You will get notifications when someone replies to your post or comment.